Creating movement in a video game is extremely resource-intensive, and even more so when you want to deform an object.
While various techniques exist, given the ambitious goal of animating vast stretches of cliffs, I opted for the most resource-efficient solution: Materials.
It might seem unusual to discuss creating movement through a technology initially developed for displaying textures, but this additional property of materials is a common feature in almost all game engines. In Unreal, it is accessible through the World Position Offset (WPO) pin. This property allows you to fake the movement in space of an object’s vertices from their original position. The only constraint is to find the appropriate mathematical function that will accurately move the points. And for that, you can trust developers’ creativity.
Here’s a small example of a material featuring a sinusoidal deformation based on height:
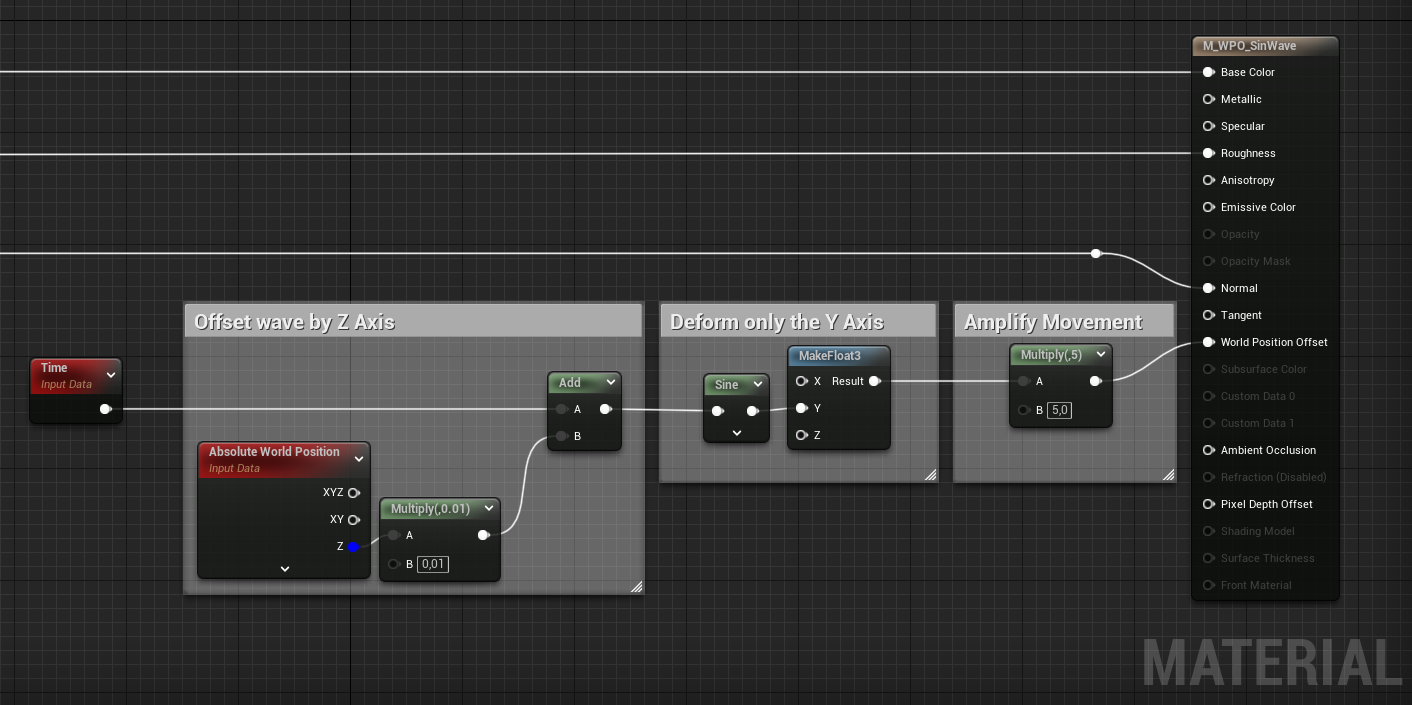
But let’s get back to our challenge. For the cliffs, we wanted the materials to become more and more distorted as you drew closer to a certain level zero. This movement is made up of two components:
- A vertical movement from top to bottom
- A horizontal movement that enters the cliff and creates an impression of infinity
I implemented this in phases.
Vertical Movement
Starting with the basic modelisation, I implemented a gradual vertical stretch (by accelerating towards the center) as you approach the interface.
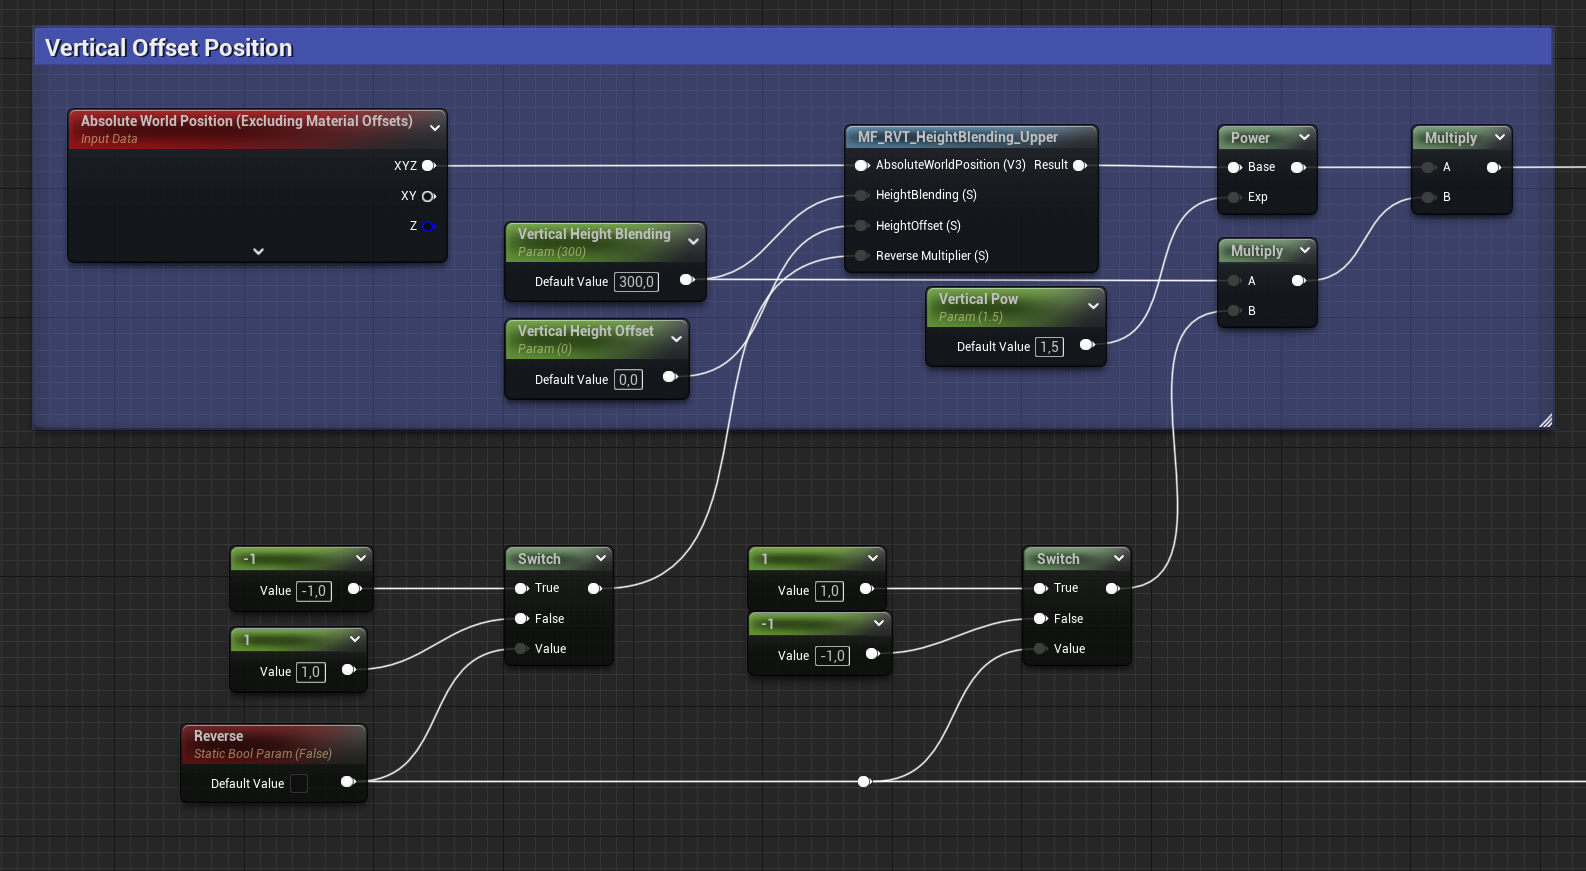
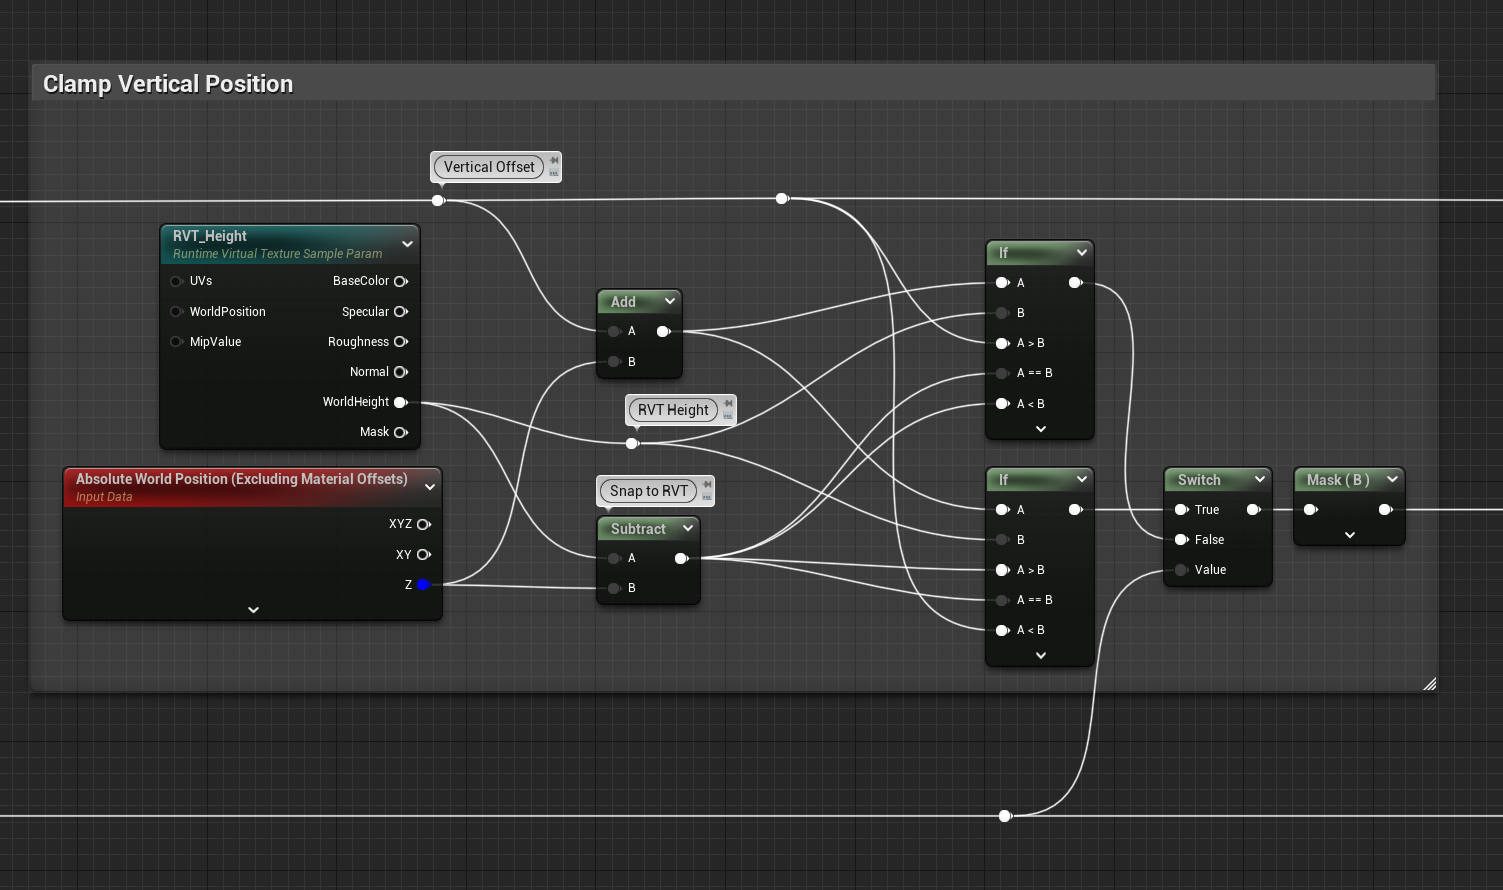
Due to the downward vertical stretching, I opted to clamp the values in order to prevent going beyond the defined limit. To put it more simply, I compressed the mesh after a certain value.
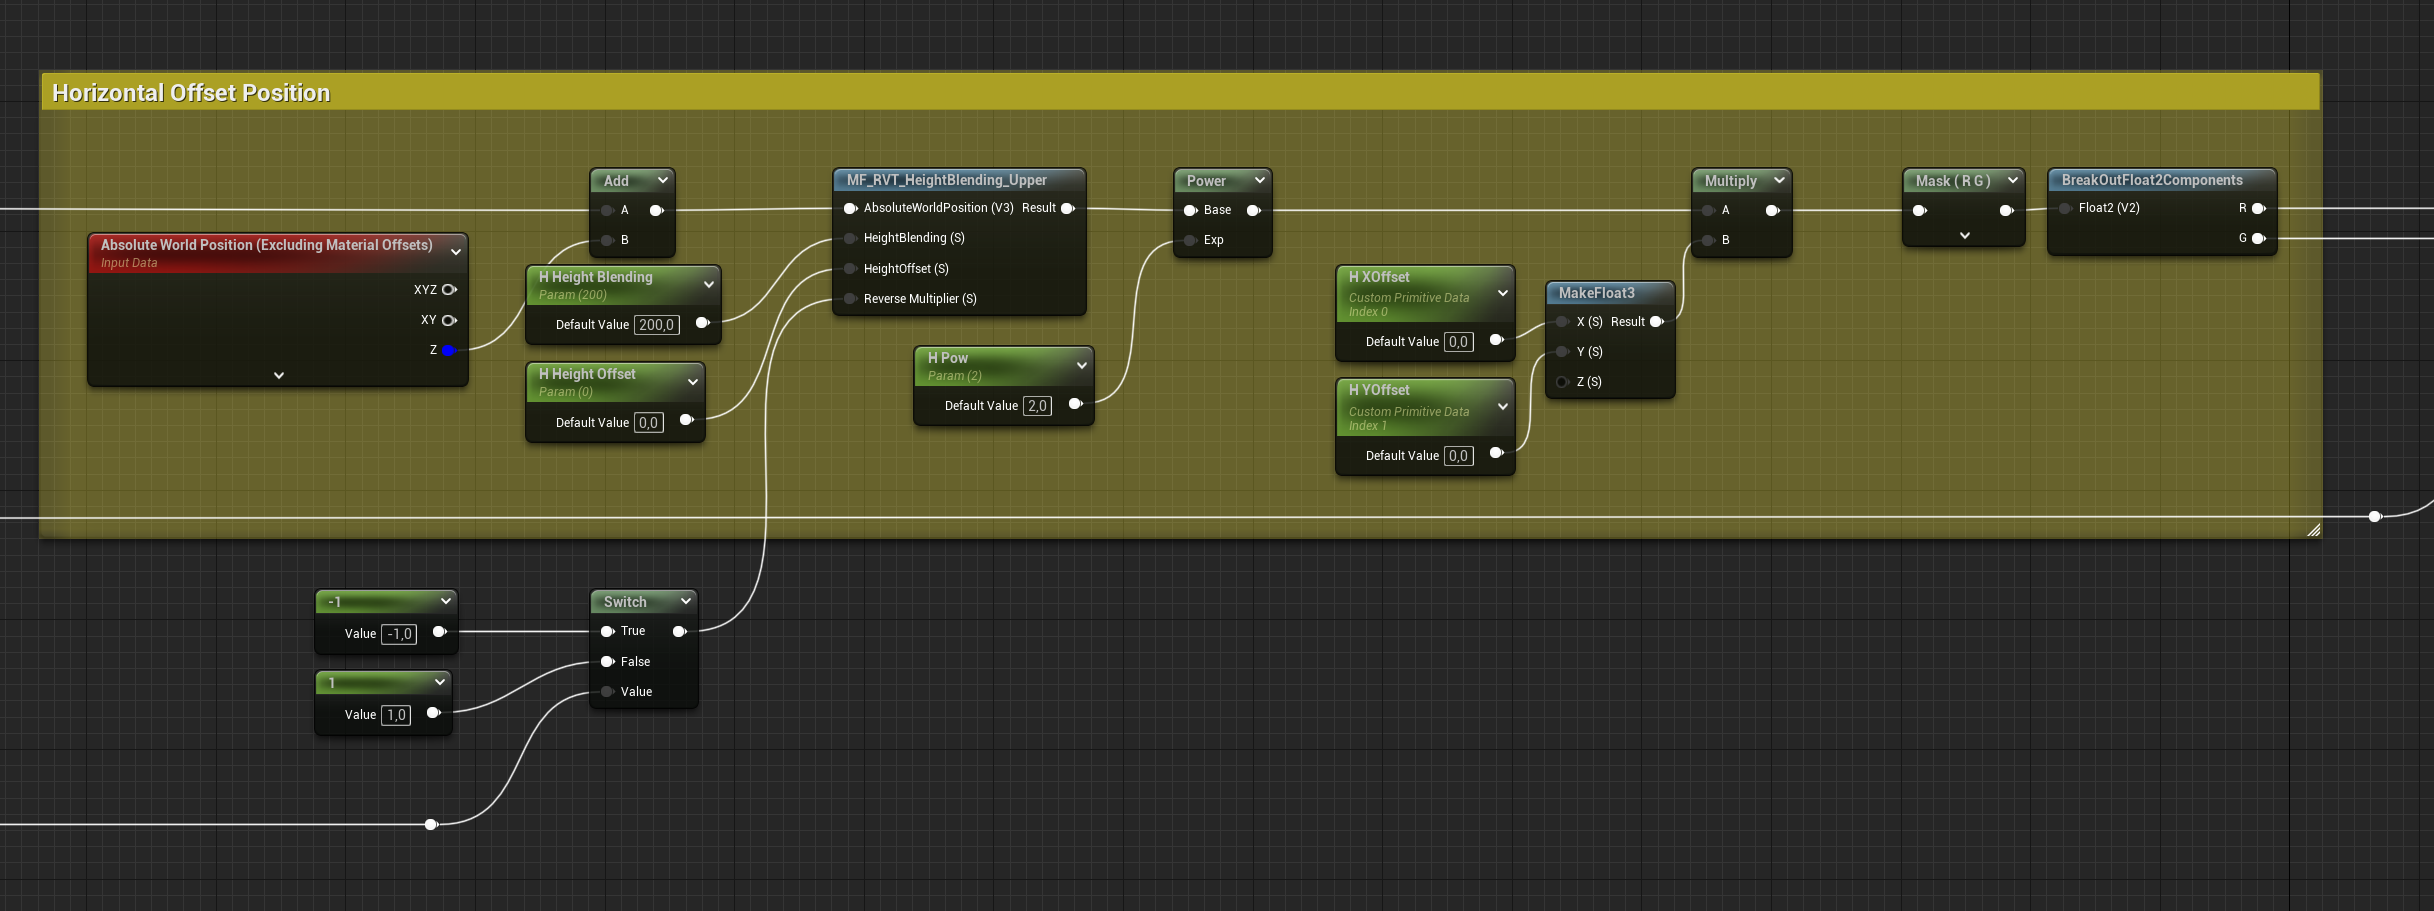
Horizontal Movement
I introduced a horizontal movement. The concept is identical to the previous one.
Olivier’s specialty
If there’s one personality trait you should know about me, it’s that I can’t stick to one single task, and I always feel the need to question the established systems. This helps me to see and understand a problem as a whole.
This time, my attention turned to our level zero.
I sensed that having a flat line throughout the level would make our environments a bit too bland.
To tackle this problem -and after exploring various technologies- I settled on Virtual Textures.
This tool is offered by Unreal, with its primary goal being to achieve a better blend of objects with their surroundings.
Despite its broader applications, what intrigued me most about this tool was the concept of calculating the distance between a terrain and the vertices of an object.
Thanks to the virtual texture implemented here, I could retrieve the distance value between a first mesh—the level zero—and the points of a second mesh—the cliff.
From this, I could draw the level zero starting from a simple spline. This automatically yielded the deformations of my original mesh along this geometry.
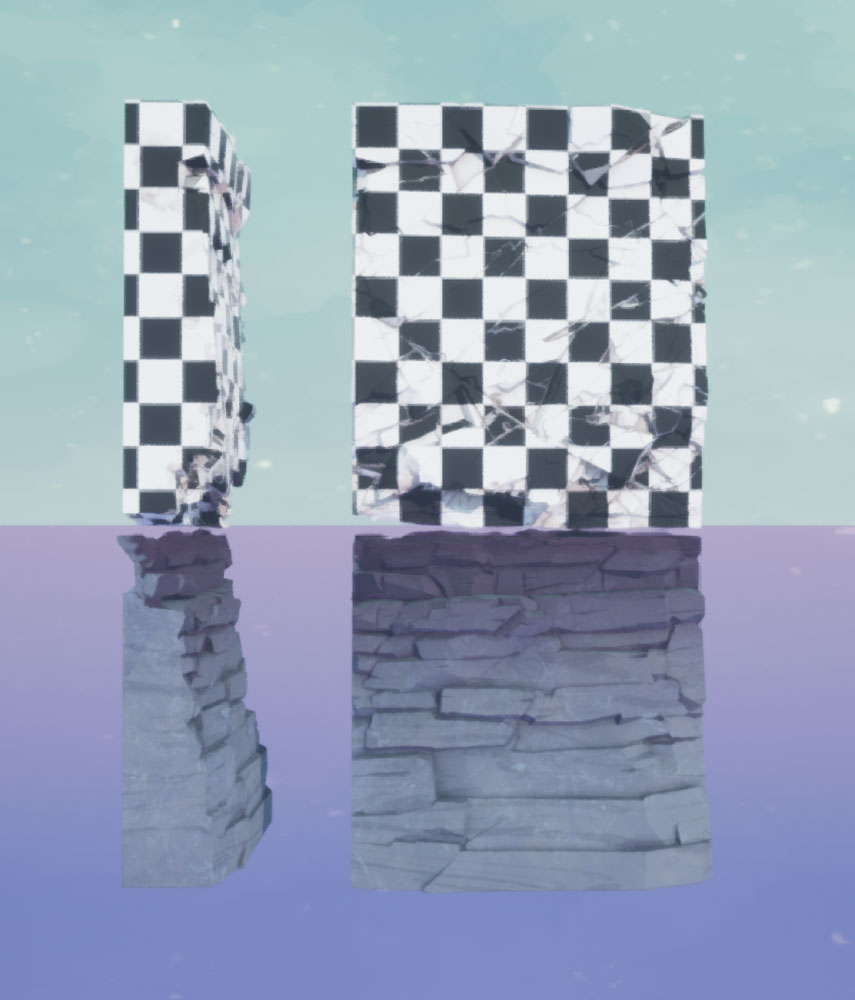
Results
In the end, we achieved: